-
Hello and welcome to MSFC. We are a small and close knitted community who specialises in modding the game Star Trek Armada 2 and the Fleet Operations modification, however we have an open field for discussing a number of topics including movies, real life events and everything in-between.
Being such a close community, we do have some restrictions, including all users required to be registered before being able to post as well as all members requiring to have participated in the community for sometime before being able to download our modding files to name the main ones. This is done for both the protection of our members and to encourage new members to get involved with the community. We also require all new registrations to first be authorised by an Administrator and to also have an active and confirmed email account.
We have a policy of fairness and a non harassment environment, with the staff quick to act on the rare occasion of when this policy is breached. Feel free to register and join our community.
You should upgrade or use an alternative browser.
KJC's 3D Printing
- Thread starter kjc733
- Start date
- Joined
- 30 Mar 2008
- Messages
- 2,477
- Age
- 39
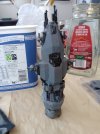
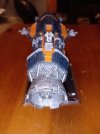
Yes, in hindsight I should have painted the PDCs before attaching them.Hello:
Quick question: Wouldn't be better to keep the part separated for paiting? Or that photo is just a preview?
I would have liked to paint the hull segments before combining them, however the bits didn't fit together as well as I would have liked which means I needed to fill the gaps and then prime over them. If it had all fitted as intended then yes.
- Joined
- 22 Oct 2006
- Messages
- 3,477
- Age
- 42
I understand, but to be there messing with the model is the way to take such decisionsYes, in hindsight I should have painted the PDCs before attaching them.
I would have liked to paint the hull segments before combining them, however the bits didn't fit together as well as I would have liked which means I needed to fill the gaps and then prime over them. If it had all fitted as intended then yes.
 .
.
- Joined
- 22 Oct 2006
- Messages
- 3,477
- Age
- 42
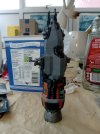
I would say make them very carefullyMore progress.
Not sure how I'm going to do the markings yet...
 , but also I know there are very fine markers for model kits like Gundams.
Crunk
Cadet Sophomore
- Joined
- 19 Oct 2022
- Messages
- 42
- Age
- 37
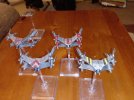
How did you do the shadow pointed bits, are they not to brittle?The coming of Shadows...
The Scout was one I downloaded and worked pretty much out the box. The cruiser is my own, but scaled up a little from what I sell on shapeways (when they let me sell it).
- Joined
- 30 Mar 2008
- Messages
- 2,477
- Age
- 39
If the points are all orientated in the same direction (as with the scout), just arrange the model so it prints with the point aiming down, i.e. they are the last things created and they taper down to the point as it prints.
The Cruiser was more difficult. Again the points are aimed down into the vat, but a lot of supports were required to along the length of the more horizontal spikes. Because I'm printing so small, the spikes don't have a lot of weight so I can use a lot of lightweight supports nearer the tips which reduces the chance of damage when removing the supports.
- Joined
- 30 Mar 2008
- Messages
- 2,477
- Age
- 39
I suggest watching videos on this channel:
This one especially is good as it describes support settings:
- Joined
- 5 Aug 2007
- Messages
- 1,262
- Age
- 40
Did see anything. LolShhhh they're Christmas presents
Someone is in for a nice gift.
Crunk
Cadet Sophomore
- Joined
- 19 Oct 2022
- Messages
- 42
- Age
- 37
They are so coolShhhh they're Christmas presents
- Joined
- 30 Mar 2008
- Messages
- 2,477
- Age
- 39
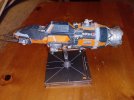
Annoyingly the peg doesn't fit properly so it's cracked
 and I still need to add markings... When I find time...
Attachments
- Joined
- 30 Mar 2008
- Messages
- 2,477
- Age
- 39
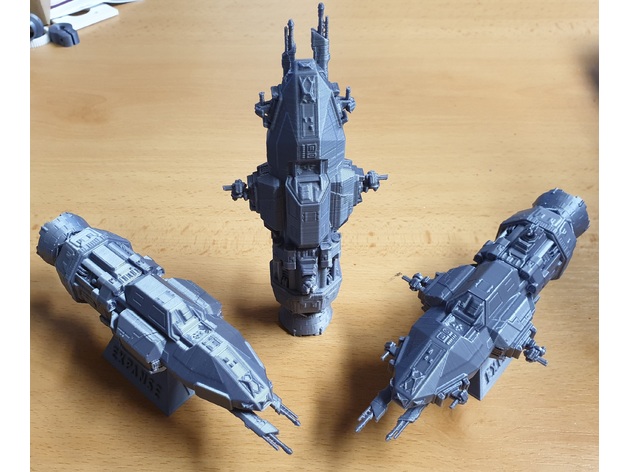
The Intrepid, Starfuries, Omegas, Nova, Warlock, Hyperions, Shadow Cruisers, Whitestars, Victory and Sharlins are all my own work.
The Shadow Scout was pretty much a straight print from download.
The Narns were about a 50% rebuild as they were way too detailed to print.
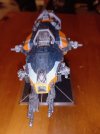
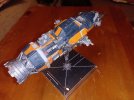
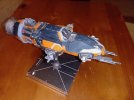
The Tach/Roci was a download but the segments were from several different people as the original had mesh errors. Plus the segments weren't quite scaled correctly so there was some work to get bits aligned.
EDIT
This is where I get the B5 models I didn't make myself
Thingiverse - Digital Designs for Physical Objects
 www.thingiverse.com
EDIT EDIT
Rocinante base model:
The Expanse MCRN Corvette - Rocinante by Deutherius
www.thingiverse.com
Fixed Drive Cone:
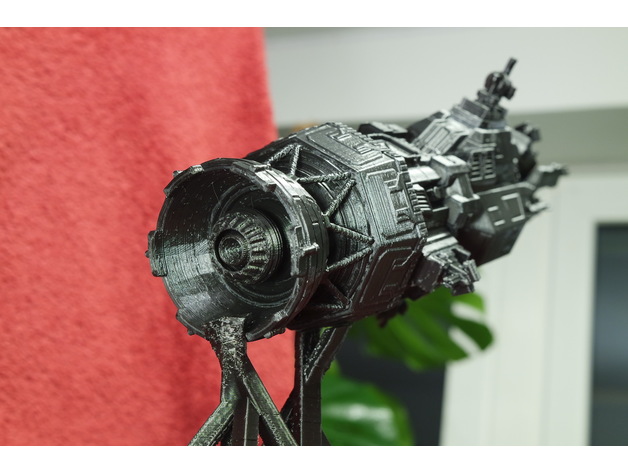
Rocinante Drive part fixed manifold by Nikkiflausch
www.thingiverse.com
Aft section with cargo door (base model is symmetrical)
Rocinante Back Section with Cargo Door by browntr230
www.thingiverse.com
Nose section with railgun (which I never printed but I did check and I see no reason it wouldn't have worked)
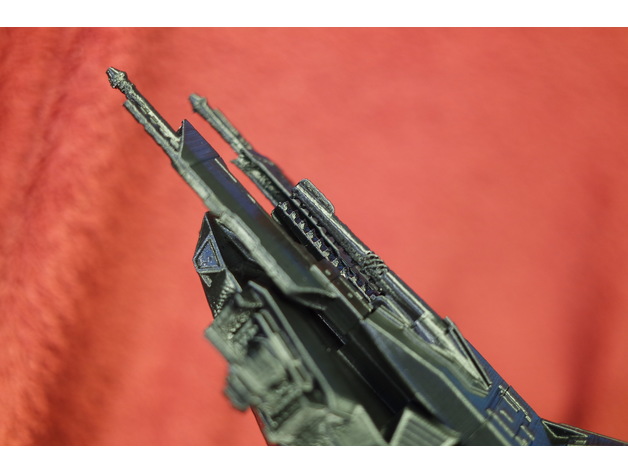
Rocinante Top part with Railgun & PDCs by Nikkiflausch
www.thingiverse.com
Basic undercarriage:
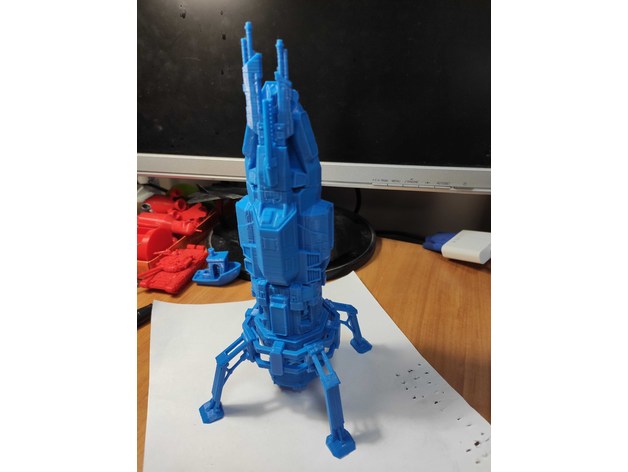
The Expanse Rocinante simple Landing Gears and Railgun by DmytryMachetovich
www.thingiverse.com
And no, this isn't the same model as the one in the Downloads, I made that one myself and it's far lower polycount than this.